What is a Liquid Extraction Baler?
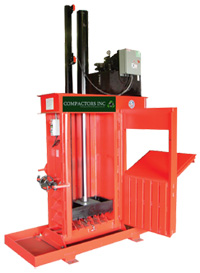
 A Liquid Extraction Baler drains and bales refuse beverage and liquid containers in one step. An internal system captures the liquid waste and diverts it to an approved drain. This makes it possible to bale refuse containers seven times faster than when liquids are extracted manually.
Frequently asked Questions
Who would benefit from a Liquid Extraction Baler?
- Grocery Stores
- Home Retailers
- Pharmacies
- Big Box Retailers
- Commissaries
- Warehouses
- Distribution Centers
- Beverage Distributors
- Hospitals, Schools & Universities
- Recyclers, Brewers
- Bottling Plants
- Micro Brewers
- Testing Centers
- Laboratories,
How much do they cost?
- $13,285.00 to $16,000.00
What material can you bale?
- Aluminum Beverage Cans
- Plastic Beverage Bottles
- PET Bottles
- Aluminum / Tin Cans
- Tetra Pak
- Bags, Bladders, Pouches
What size bale can you produce?
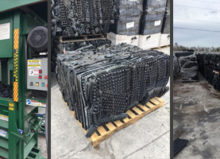
- Bale Weight Up to 250 lbs.
How much footprint does a baler need?
- Dimensions WxDxH (inch) 45 x 47 x 119 / 82
- Dimensions WxDxH (inch) 70 x 93 x 129
How much does a Vertical Down stroke baler weight?
- Model PC24 HD Weight (lbs.) 1985
- Model V3016HD Weight (lbs.) 3800
How does it ship?
- Standing up on a flatbed truck
How do you unload it from the truck?
- A fork-lift is the most used machine for unloading the vertical baler from the shipping truck. The lifting equipment must be designed for lifting the weight of the baler.
- How do you install a baler: concrete, weather, electrical, breather cap, press head?
- The Vertical Baler requires up to 10’ x 12’ of clear floor space and up to 14’ of ceiling height for proper installation and operation. This space should always be kept clear of materials which could interfere with the safe operations of the baler.
- POSITIONING
- Positioning the vertical baler so that the sufficient room is available for proper and safe operation. The back of the baler should be placed no less than 24 inches from any structure to allow room to insert wires and tie of the bale. Also, enough room in front of the baler must be present to allow the chamber door to swing fully open so the finished and tied bale can be ejected.
- ANCHORING
- Compactors Inc. recommends mounting the baler on a pad of steel reinforced concrete with a minimum of 3000 psi capacity. The pad should be at least 4 inches deep. The baler should be anchored to the pad with 4 (6 on S865 Models) ¾”anchor bolts 5” to 6” long. To allow for construction variances, the holes should be drilled after locating the baler in the desired position.
- ELECTRICAL
- A lockable fused disconnect switch (customer furnished) must be installed within 5 feet, and in the line of site of the baler electrical enclosure. This disconnect must be sized in accordance with the baler motor and voltage.
- HYDRAULIC
- Check for any hydraulic oil leaks and make sure that all hoses are tight.
- NOTE: Ensure the plug has been removed from the hydraulic reservoir and the breather cap is installed. Failure to do this step will result in the Power Unit being damaged!
How does the Liquid Extraction Baler work?
- Fill your plastic bottles or aluminum can waste into the baler.
- A full-light indicator tells you when the chamber is full.
- Tie off and eject the finished bale.
- Remove the bale and store until collection.
How do you build a bale?
- BALING OPERATIONS:
- Close and lock main door by tightening hand wheel (ratchet on XHD) lock.
- Open Safety Gate and Load Material to be baled.
- Pull Down Safety Gate.
- Turnkey Switch to ON Position.
- Press the Down Push Button, Platen will automatically cycle.
Repeat Steps 1 through 5 until Bale is formed, Platen will automatically stop in the DOWN position when bale is full, except on OCC Models where baler is shut down manually at Full Bale. Some balers also have an OPTIONAL Full Bale Light that will come on at the same time the Platen automatically stops.
TIE-OFF AND EJECT BALE:
- Open Main Door when Platen stops in down position.
- Insert Baling Wires through the floor slots.
- Insert Baling Wires back through the Platen slots from the rear of the Baler.
- Tie-Off Baling Wires located in the front of Baler.
- Located at the REAR of Baler, hook up the Ejector Chain (s) to the Red Platen Brackets.
- Stand clear of the front of Baler and push the UP-push button. (Notice that the Bale will automatically eject.)
- Remove bale.
- Close main chamber door and tighten door hand wheel (ratchet on XHD) lock. (DO NOT LOAD NEW MATERIAL AT THIS POINT. WAIT UNTIL STEP 14 IS COMPLETE.) 14. Close safety gate and run Platen down to automatically remove ejector chain (s) from Red Platen Brackets. Skip this step on OCC Models. Ejector Chains must be removed at this point manually and returned to the storage peg.
Ready to repeat steps 1 through 14 for next Bale.
Electrical options:
- 208V, 230V, or 480Voltage 3 Phase
Hydraulic Oil:
- 20 weight. Texaco Rando HD 68
Safety System:
- UL listed controls & totally 100% ETL approved
- All welds meet AWS requirements
- Fully jig & fixtured heavy duty structural steel design
- 3-D SolidWorks finite element analysis (FEA) stress analysis engineered units
- Factory tested & inspected (Quality Assurance Mgr./Team)
- Full bale light
- NEMA 4 control box & safety interlock switches
- External motor starter reset button
- Warning signs – meets/exceeds all ANSI & OSHA specifications
- Factory wired for easy installation
Preventative Maintenance:
- Compactors Inc. recommends that you maintain a record of your preventative maintenance inspections. Failure to perform regular maintenance may result in damage to the Baler.DAILY:
- Inspect for Oil Leaks.
- Inspect Oil Level. Note: With the Platen Up, Hydraulic Tank should be ¾ full.
- Inspect the following for Loose, Damaged or Missing:
- Bolts
- Ejector Chains
- Limit Switches
- Welds
- Safety Decals
- Guards
- E-Stop Switch
- Inspect for Debris:
- Remove All Debris Around Baler
- Remove All Debris from Top of Platen
MONTHLY: - Check for Signs of Wear:
- Inspect Cylinder for Scars on Rod
- Oil Leaks
- Mounting Bolts are Tight
- Door Hinges/Hand Wheel for excessive play
- UHMW on Gate and Platen for abnormal wear
- Lubricate moving parts (Sprockets, Chains, Hinges and Turnbuckle (Repair or Replace if Required)
- Check Hydraulic Oil. Should not be Cloudy or Milky in appearance (Replace if Required)
- Check Air Breather/Filter. (Replace if Required)
- Check Oil Filter; located in the Hydraulic tank under the access panel. Change Every 12 Months
- Check Hydraulic Fittings and Connections. (Repair or Replace as Required)
Options:
- Oil Heater
- Weatherproof Package
- PC24 HD Option for regular paint instead of galvanized
- PC24 HD Block access to baler controls with auto lock
- The auto lock lets you decide who can use your baler. Everyone can load it, but it requires a PIN code or a personal key tag to run press cycles.
The PC24 HD is not only capable of baling your cans or plastic bottles, but it will also capture any liquid residue in the collection reservoir at the bottom of the machine.
The PC24 HD will crush aluminum cans so densely, you do not need to tie off the bale to get it to stick together.
Baler PC24 HD Galvanized
The PET and Can baler – PC24 HD Galvanized is a very Heavy-Duty baler made for crushing the most dense materials.
The PC24 HD baler is suitable for smaller recyclers, breweries, bottling plants etc. With a single full penetration, heavy duty cylinder, this baler is ideal for even the most rigid materials.
V3016HD
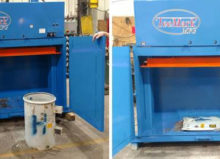
Our Liquid Container Baler combines draining and baling refuse beverage or liquid containers in one step.
You can increase your recycling time of refuse containers over 7 times faster than manually extracting the liquids. This equipment can make a single bale from up to 4000 aluminum beverage cans and up to 2000 plastic beverage bottles. The baler includes a system to capture the liquid waste and divert it to an approved drain.


